Image Map
Showing posts with label Word Wall. Show all posts

A Bunny Blog Hop

A Tisket, A Tasket, Freebies for your Basket!

Several phenomenal teachers and bloggers are joining forces for an amazing bunny blog hop!  As you follow us along the bunny trail, you will visit some of your favorite blogs and discover a few new blogs too!  Each with a fabulous freebie just for you!


Thank you for hopping on over to my blog! 

Recently, I completed a second post featuring my Classroom Makeover Series  complete with my "All in One Word Wall" bundle (scroll down below).  I gave my Word Wall a heavy duty makeover.  For my Funny Bunny Freebie, I knew I had to create some "Use-Them-Anytime" activities to share with you all.  They are perfect for grades kindergarten to grade three.

The first part has five sheets that can be copied and placed in a literacy center.  The second part has six additional activities you can print out ahead of time and use them for Word Work in your literacy block.  Check out this Scavenger Hunt.


Working on Alphabetical Order?  This activity can be used over and over again.


These activities include rhyming, digraphs, writing sentences, vowel teams, using question words, and syllabication--OH MY!

 So here they are...

Enjoy my "What Do I Do With My Word Wall?" Freebie by clicking HERE!


Thanks for stopping by and visiting!  If you are new to my blog and liked what you see, don't forget to follow me.  A Tisket, A Tasket, next up with a Freebie for your Basket is Susanna from Whimsy Workshop.  Hop on over!

Just in case you didn't join us from the beginning, here is an ordered list of all the participating blogs.

Stephany from Primary Possibilities
Sally from Elementary Matters
Lory from Fun for First
Linda from Primary Inspiration
Nicole from Mrs. Rios Teaches Second Grade
Brian from Hopkins' Hoppin' Happenings
Liz from The Happy Teacher
Jennie from JD's Rockin' Readers
Sarah from Learning is for Superstars
Teresa from Fun in K/1
Nikki from Teaching in Progress
Faith from Kindergarten Faith
Renee from Fantastic First Grade Froggies
Amy from Happy Teacher Heaven
Leah from Learn with Leah
Nicole from Teaching's a Hoot
Kristy from The Phonic's Phenomenon
Rich from Mr. Giso's Room to Read
Susanna from Whimsy Workshop
Amy from Motivate to Learn
Lola from Preschool Wonders
Kimberli from Mixing the Next Batch

Diary of My Word Wall Makeover

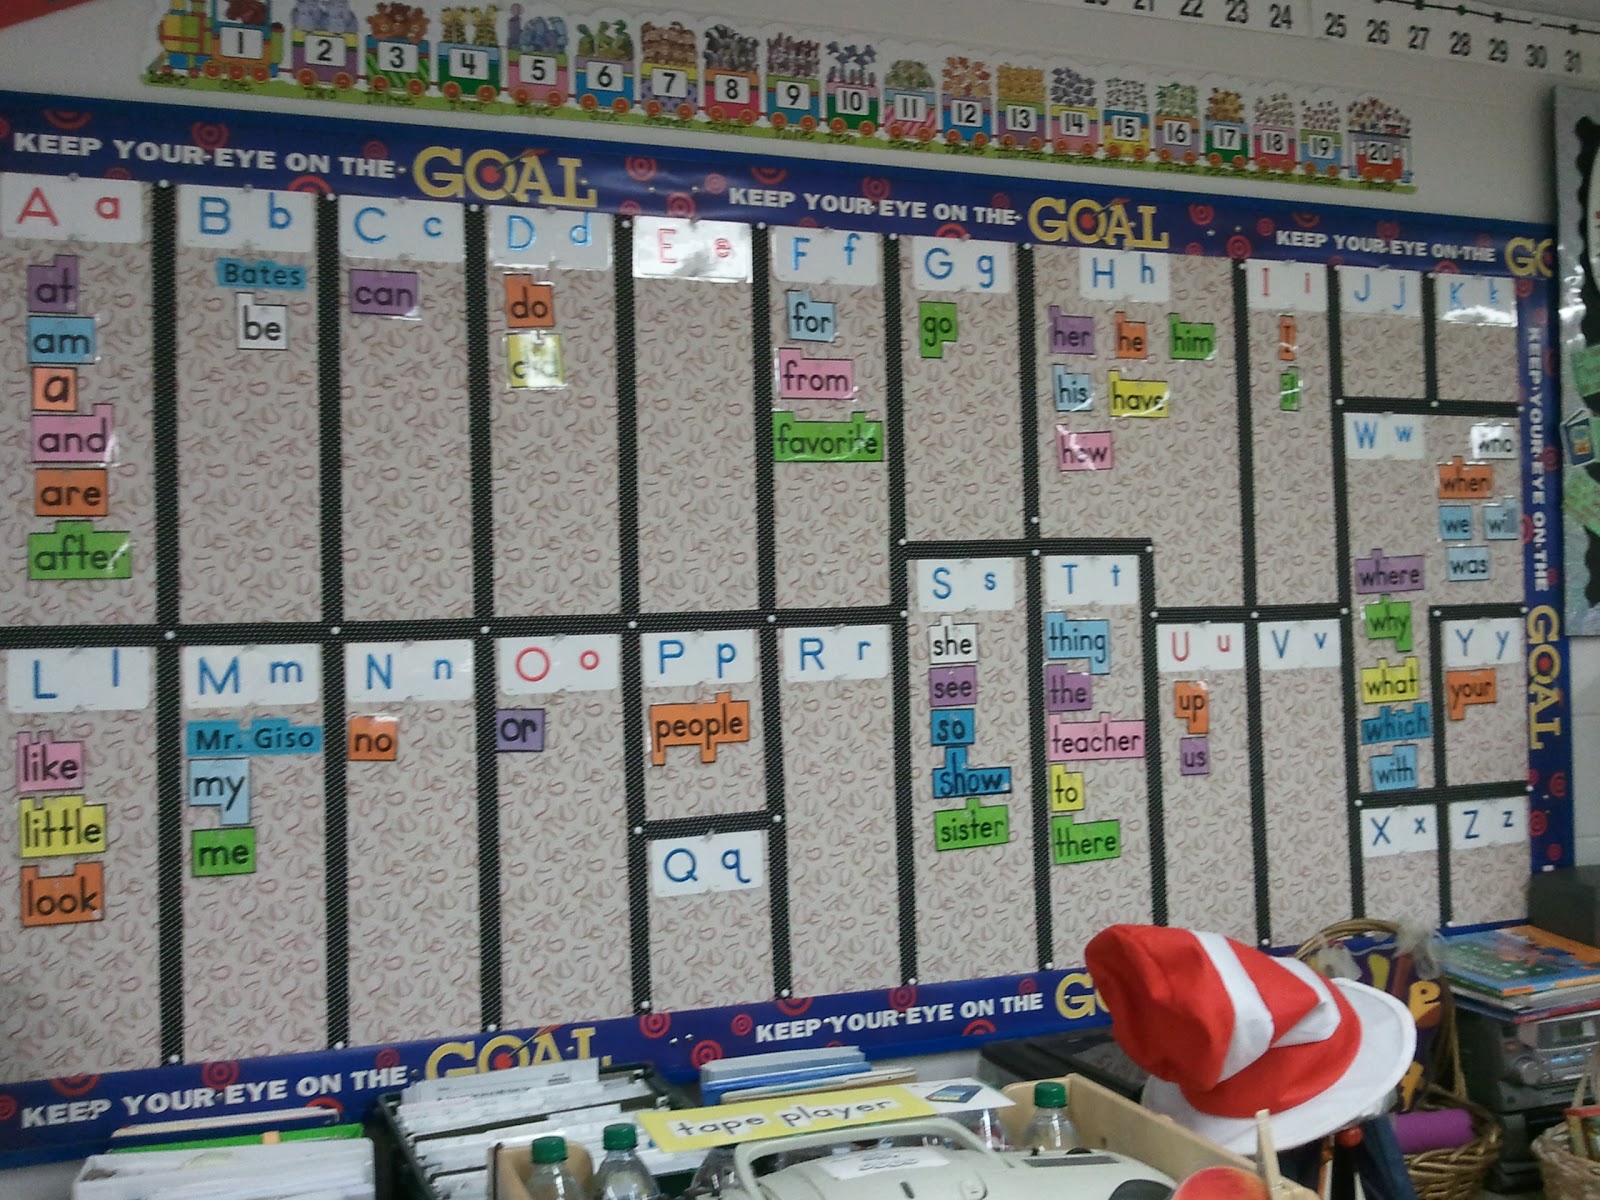
This is my second blog post in my "Classroom Makeover Series."  After making significant improvements in my Mathematics Center for my first "Classroom Makeover," I had easily decided to go on to making over my supply cart.  One afternoon, however, I came across an old blog post (2011) on Word Walls inspired by the great Debbie Diller.  In Chalk Talk: A Kindergarten Blog, Mrs. Larremore sports her word wall with insightful recommendations based on Debbie Diller's Work.  Having incorporated this great blog find with some research of my own, my goals for this makeover included the following.

               1.  Improve the Location:  My prior word wall was located pretty far away from my four groups of students' desks.  In addition, I even had a rolling chart stand, an easel and some other furniture blocking parts of the word wall.  I know what you are thinking.  This is a big "no, no."

               2.  Make the Words Uniform:  My prior word wall words (purchased from a teacher store that shall remain nameless), were in many different colors with the words all trimmed according to the shapes of the letters.  This did not appear to be uniform, and was in fact a bit distracting to the eye.

               3.  Add a Picture to Reinforce Letter Sounds:  My prior word wall obviously had both upper and lower case letters, but did not have a picture to reinforce initial sounds.  I teach first grade, and not all of my young readers arrive knowing all of their letter sounds.  Since I add words to my word wall starting the first full week of school, having pictures along with my letter headings would be more effective to ALL learners from day one.

               4.  Increase the Space and Create an Organized Grid for My Word Wall:  The organization of my prior word wall was not balanced, visually.  It was measured according to how much space I needed for each letter.  For example, I had a large space for "W" because I knew I would have a lot of "w" words to put up.   This was due to a limited space on my bulletin board.  By creating a grid with electric tape and by moving my word wall to where there's more space, I knew it would be easier for my kids to use.

               5.  Utilize a Solid Background:  My words on my prior word wall were placed on a busy fabric.  This was definitely too distracting for my first graders.  

SO, with these goals in mind, I'm almost embarrassed to show these two before pictures of my word wall.  If you look closely, you will see it in the distance. 


Note that the ribbon border above was added right after I came across the blog by Chalk Talk.  I was so amazed at the difference it made, I kept on going with the improvements.  The brain definitely sees better with borders.  

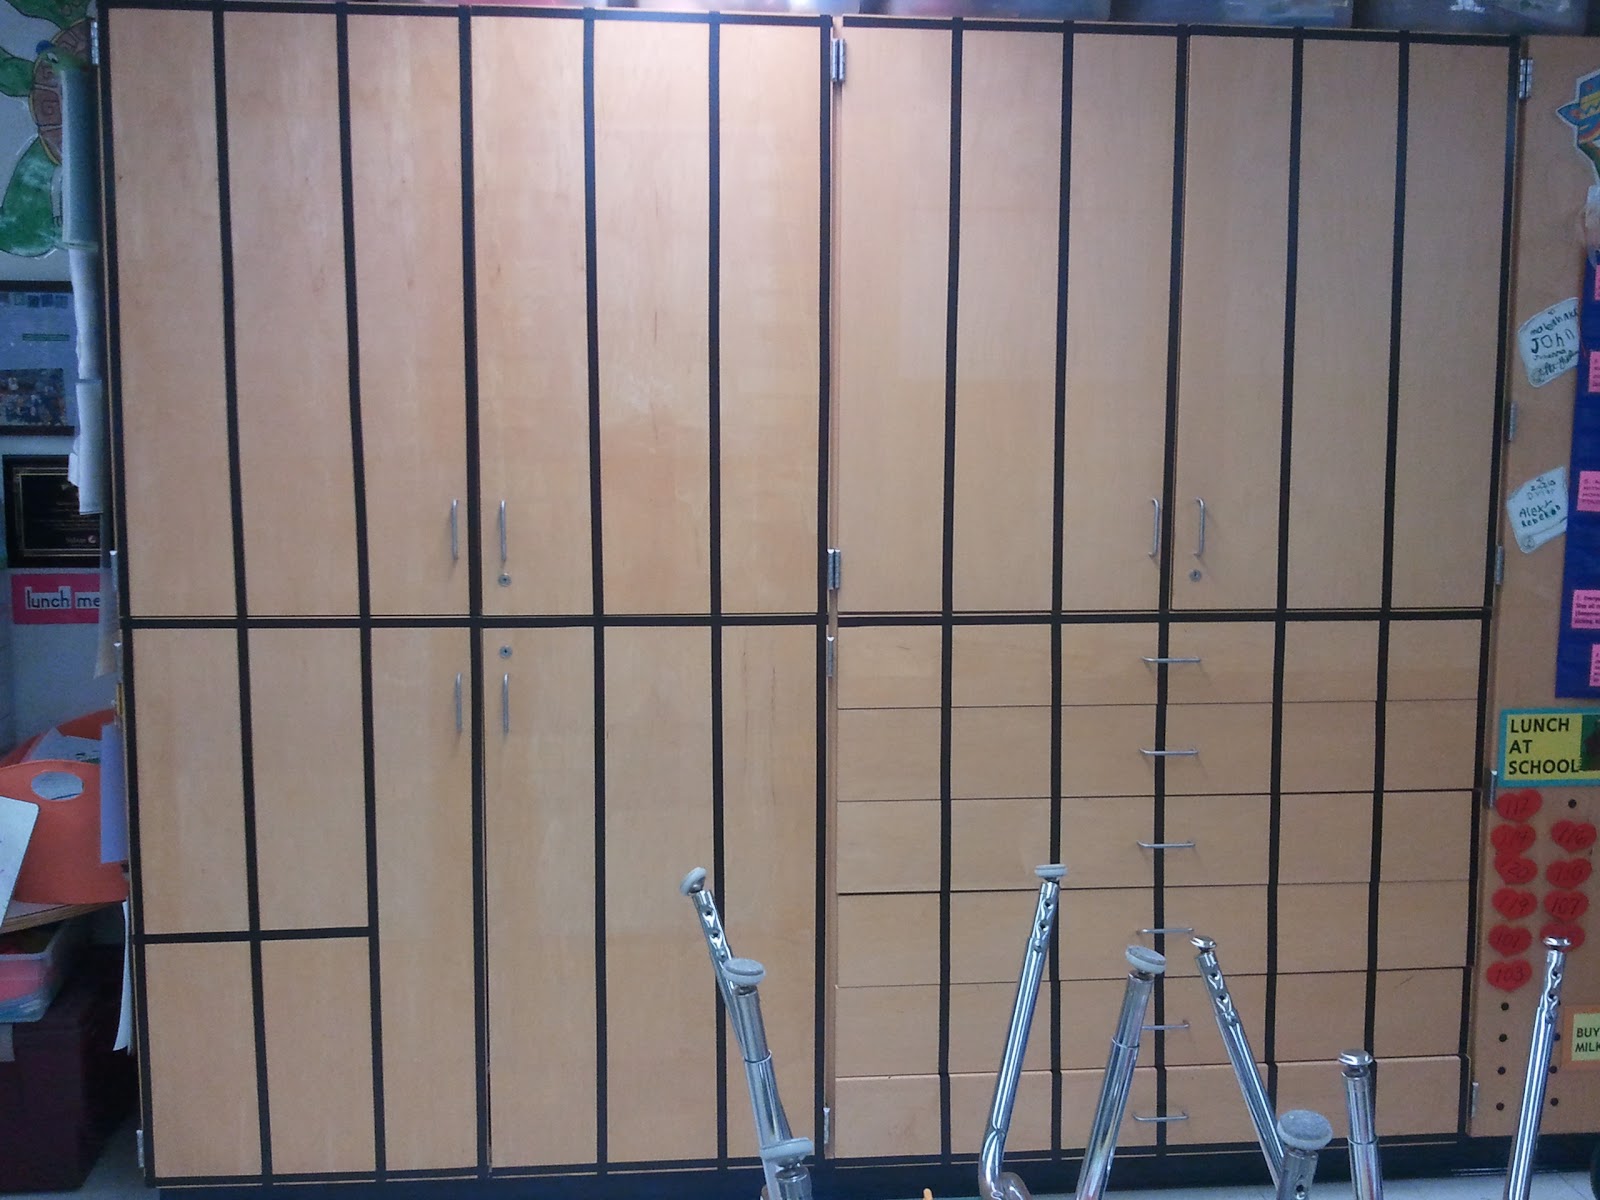
First, I removed all the store bought visuals from my cabinets.  I couldn't remember the last time my students used many of them.  Second, I purchased a bunch of this electrical tape and started measuring with my tape measure.


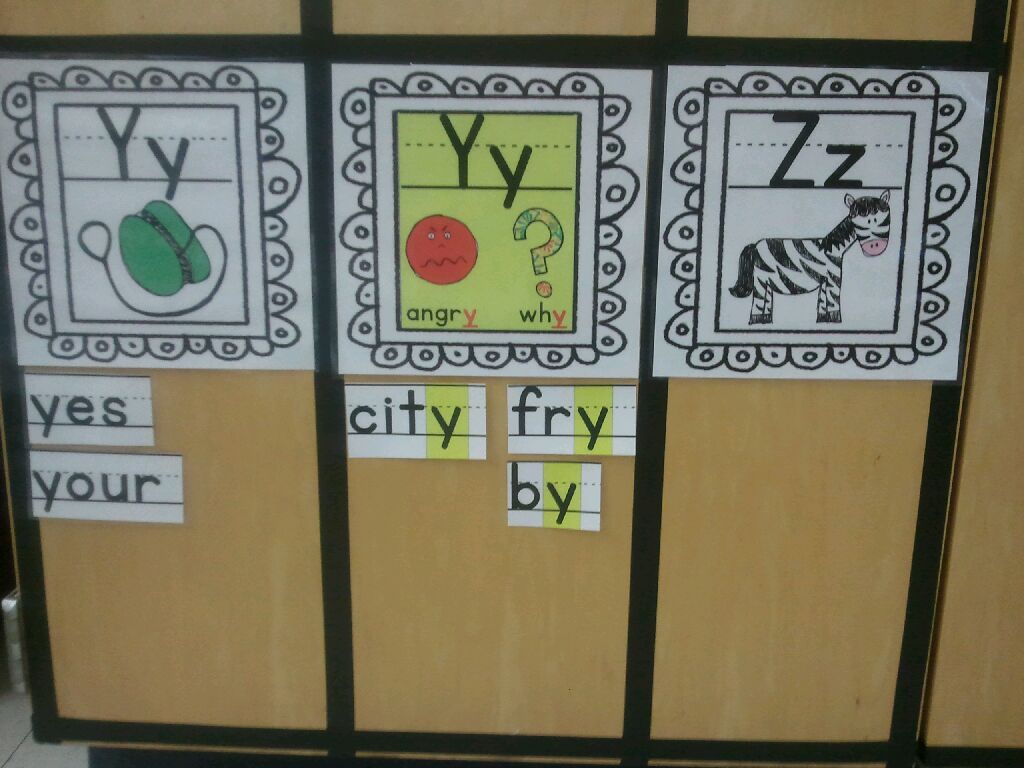
I decided to make a 2 by 12 grid in order to create 24 boxes for 24 letters of the alphabet.  I added the last two letters, Y and Z, at the bottom.  It looks a little bit like jail, I know, but boy does it look organized!   


Third, I went to work searching for the perfect font, frames and clip art to make my my letter headings and word wall words.  I trimmed, cut and laminated away.  Lots of words, words, words!  I colored the whole word yellow when it began with a vowel for easier recognition.


After this, my fourth and final part of this makeover was the most exciting.   I put up the letter headers and the words we had added so far.  Right away, you can notice the difference.  I decided to incorporate the headline, midline and baseline into each word to encourage my first graders to not only correctly spell, but to also correctly write each word with accurate letter formation.


Look how nicely the vowel "O" and its words stand out in yellow.


It was quite the project doing the tape work around my pull out drawers.  I even cut the letter headings, too and removed some hardware...shhhhhh.  Notice how the columns made with the electrical tape draw your eyes to each letter and its words so easily!  It's amazing how our brains work.


I decided to add a section for "Y" when it is used as a vowel.  Too often we just say "sometimes y" when we chant the vowels, but my new word wall offers a visual to reinforce the fact that "Y" serves as a vowel when it sounds like long "e" or long "i."  Check this out.


Last but not least, my finished product was ready.  My new Word Wall is right next to my students' desk groups and is most definitely easy to read.


To get the colorful letter headers, a "Word Wall" banner (not pictured) and the words included in the pre-primer to third grade Dolch List (plus more bonus words that I use), head on over to my TpT store by clicking here.  

Some Word Wall Suggestions for You to Consider

How does your word wall measure up?  You may want to consider the following.

•Do you have BOTH upper and lower case letters displayed in alphabetical order?

•Do you have your VOWELS in a distinct color in order for them to stand out from the consonants?

•Do you (for Pre-K and K) have examples of environmental print up such as cereal names, fast food names, road signs, candy bars, etc.?

•Do you for (Pre-K and K) have the student names on the word wall to help them learn the sounds?

•Do you have appropriate high frequency words displayed in which you hold students accountable for BOTH reading and spelling them?

•Do you have your word wall displayed in your whole-class teaching area for easy visibility?

•Do you have your word wall low enough (for the younger grades)?

•Do you have an interactive component to your word wall (can students take the words off easily with magnets, Velcro etc.)?

•Do you have a grid with borders for each letter and its words?  Remember our brains are programed to "see in borders!"

•Do you have the words large enough, in black, and on a solid background without patterns or loud borders?

•Do you have interesting vocabulary words in addition to high frequency words in grades two and up?

•Do you (for grades Pre-K to grade one) feature a picture to accompany each letter to foster phonics?

•Do you have tools for word work nearby (pointers, wands, magnetic letters, letter tiles, etc.)?

I hope I've inspired you to make your word wall more student friendly.  Let me know what you think.